Managing Faxes
To Manipulate incoming faxes in the inbox, users can click the “Open” action which will provide several update request options as below (Note: for referrals that are an electronic request such as Ocean or an order from a Health Information System these options will be limited)

Move Request – Move to another inbox queue (i.e. to be used if a referral ends up in the wrong inbox, to avoid requiring the sender to refax)
Clone Request – Cloning creates a duplicate of the referral. This can be used in instances where the referral is requesting multiple services (i.e. referral is requesting an MRI and CT which would require two separate referrals to process) needs 2 appointments or for shared referrals where a referral needs to be sent to another area
Update Urgency - Assign the referral a urgent priority which only displays while the referral is in the inbox (can be used if there is a high volume of incoming referrals and a user is reviewing they can mark any with an urgent flag which will mark it as such and also move the referral to the top of the inbox)

Remove Pages – Remove pages from a fax (i.e. a blank page or information that is not required to include)
Reorder Pages – If pages come out of order and you want to put a specific page first
Split Pages – To be used in cases where a fax contains more than one referral (i.e. one fax with 2 different patients referrals)
Rotate Pages - If the referral comes in upside down you can rotate the document which will save the format automatically
Rejecting a Fax
From the Inbox click “Process” action
Click Reject/Dismiss from the Request Details page
.png?sv=2022-11-02&spr=https&st=2025-07-17T14%3A40%3A34Z&se=2025-07-17T15%3A01%3A34Z&sr=c&sp=r&sig=JZ6tR1UgVbat2uFZhsjD32Ld7DJAtER4g6i7VfR5yXQ%3D)
Select the “Reason for Rejection” from the drop down field (Note: all reasons EXCEPT for Junk Request will allow the user to send a fax back)
.png?sv=2022-11-02&spr=https&st=2025-07-17T14%3A40%3A34Z&se=2025-07-17T15%3A01%3A34Z&sr=c&sp=r&sig=JZ6tR1UgVbat2uFZhsjD32Ld7DJAtER4g6i7VfR5yXQ%3D)
In the Fax Number field a fax number may appear automatically, the user MUST ensure they review the number that appears to ensure it is correct as the fax number displayed are not populated from the Administrator Module and are taken from the “Received From” column in the inbox
Complete the remaining mandatory fields “From”, “To” and “Subject” and add any notes in the notes for requesting office textbox if needed
If you have any fax templates uploaded to your account, you can also select the template to send along with the rejection fax
When ready, click Reject Request
The fax will send the referral, reason for rejection cover sheet and the fax template if one was selected and will no longer appear in the Active Inbox
Junk Faxes
For faxes received that are considered Junk or not required to be sent back, you have the option to remove them from the inbox by selecting the Junk Request as the Reason for Rejection. This will provide an optional notes text box that the user can choose to use or leave blank. If the user chooses to add notes, they will be captured as part of the Status Reason from the Dismissed filtered inbox
.png?sv=2022-11-02&spr=https&st=2025-07-17T14%3A40%3A34Z&se=2025-07-17T15%3A01%3A34Z&sr=c&sp=r&sig=JZ6tR1UgVbat2uFZhsjD32Ld7DJAtER4g6i7VfR5yXQ%3D)
Filtering the Inbox
In each Inbox there is a filter option that automatically defaults to Active for all users so that they immediately have access to the new incoming referrals. This filter can be used to locate a referral that may was accidentally removed from the inbox and can be processed if needed. Below describes what each filter provides (Note: referrals are permanently removed from these filtered lists every 6 months)
.png?sv=2022-11-02&spr=https&st=2025-07-17T14%3A40%3A34Z&se=2025-07-17T15%3A01%3A34Z&sr=c&sp=r&sig=JZ6tR1UgVbat2uFZhsjD32Ld7DJAtER4g6i7VfR5yXQ%3D)
Cleared - Referrals that have been Dismissed as Junk or Attached to Existing eRequest
Dismissed - Referrals that have been Dismissed as Junk, this filter also provides the user id of the individual who dismissed it and the notes if any were added (this can be seen by hover the question mark beside the Status Reason)
.png?sv=2022-11-02&spr=https&st=2025-07-17T14%3A40%3A34Z&se=2025-07-17T15%3A01%3A34Z&sr=c&sp=r&sig=JZ6tR1UgVbat2uFZhsjD32Ld7DJAtER4g6i7VfR5yXQ%3D)
Rejected - Referrals that were faxed back, where the rejection reason was any except for Junk Request (same as dismissed the user id and status reason with any notes can be viewed)
Send an Outbound Fax
In the event you need to send a fax from an eReferral, follow these steps:
Have the referral open
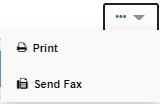
Click the button with ellipsis and choose Send Fax
The Send Fax window will open, review the options shown for fax number to ensure you select the correct one, or if none are correct select the “other” option to manually type in the correct fax number
Complete all mandatory fields (mandatory fields are marked with a *)
.png?sv=2022-11-02&spr=https&st=2025-07-17T14%3A40%3A34Z&se=2025-07-17T15%3A01%3A34Z&sr=c&sp=r&sig=JZ6tR1UgVbat2uFZhsjD32Ld7DJAtER4g6i7VfR5yXQ%3D)
If you have any templates created an saved to your account, you will have the option to select it to include
You can choose to include attachments and the Print version of the eReferral.
Once complete, click Send Fax
A preview of the fax will show with the option to go back and make any edits if needed
Once the fax has been sent users can click the History tab of the referral and see under Communication History the log of the fax.
.png?sv=2022-11-02&spr=https&st=2025-07-17T14%3A40%3A34Z&se=2025-07-17T15%3A01%3A34Z&sr=c&sp=r&sig=JZ6tR1UgVbat2uFZhsjD32Ld7DJAtER4g6i7VfR5yXQ%3D)
Any user will have access to see this information. The View action allows the user to see the fax that was sent and resend it or resend it to an alternative fax recipient.
Receiving Partial Faxes
Partial fax transmissions may be caused by a variety of factors.
Fax line disconnected after multiple retries
The call dropped prematurely
Timeout; the number dialed rings but the call is never answered
The remote fax machine disconnected unexpectedly after indicating that it was not ready to initiate a fax session.
The remote fax machine responded with a disconnect message after a page was sent successfully. Depending on the remote machine's behaviour, it may have still printed the sent page and any preceding pages.
The fax service received an invalid error correction message from the remote fax machine.
To help reduce fax transmission errors moving forward, here are a few suggestions to help with troubleshooting both your phone line and your fax equipment:
Phone line:
Contact your phone company’s support team and explain that you are experiencing a high failure rate with your fax machine and frequent disconnects while attempting to transmit faxes. Phone line support may assist in performing diagnostic tests or may dispatch a technician to physically inspect the lines near your building, or in the building itself.
Fax equipment:
If your phone company's technician is unable to resolve the connection issues, the main cause of error may be the fax equipment itself. It is recommended to contact the equipment manufacturer or supplier support line and explain the increase in fax errors as well as the troubleshooting steps your team has already attempted. The manufacturer or supplier support team may have several suggestions for your specific equipment, such as changing settings on the machines/equipment, restarting the equipment, etc.
Auto Fax Back Function
Please note that these may vary depending on your organization's request changes.
.png?sv=2022-11-02&spr=https&st=2025-07-17T14%3A40%3A34Z&se=2025-07-17T15%3A01%3A34Z&sr=c&sp=r&sig=JZ6tR1UgVbat2uFZhsjD32Ld7DJAtER4g6i7VfR5yXQ%3D)
It is the user's responsibility to verify the accuracy of the information provided.
If you enable auto fax back before the referral is created (before save is clicked) the receipt of referral will be sent If you enable the auto fax back from the settings tab after the referral has been created only the appointment auto fax back will be sent .
Auto fax are sent when:
Referral is created
This is not tied to the Work in Progress state, as auto-fax will be sent regardless of if it has been submitted yet, or is still Awaiting Submission
Appointment is scheduled
Auto Fax are NOT sent when:
Appointment is canceled
Appointment is completed
Referral on hold
Referral Creation Fax Back Notifications
Updates to the locations associated with the auto fax back for Referral created. This can be performed through the Administrator module Novari Identity Management. Please see images below. We recommend that you test this in the Test environment before you do any updates to the Production form.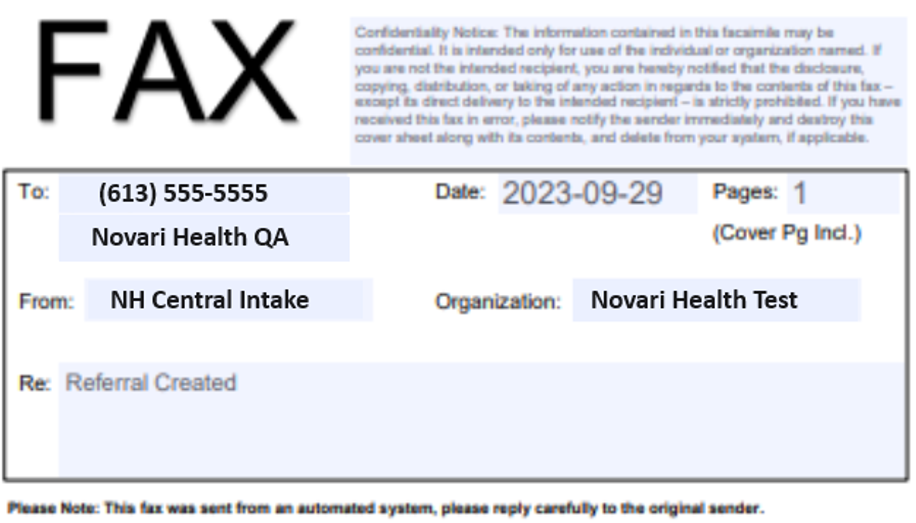
Open Novari Identity Management.
Select the Locations tab
.png?sv=2022-11-02&spr=https&st=2025-07-17T14%3A40%3A34Z&se=2025-07-17T15%3A01%3A34Z&sr=c&sp=r&sig=JZ6tR1UgVbat2uFZhsjD32Ld7DJAtER4g6i7VfR5yXQ%3D)
Search for the location in question
On the Location Details Page, in the name field click the arrow to bring up the side menu to edit the name to change it (keeping in mind this will update the name anywhere it appears) such as the Inbox queue.
Click Save
.png?sv=2022-11-02&spr=https&st=2025-07-17T14%3A40%3A34Z&se=2025-07-17T15%3A01%3A34Z&sr=c&sp=r&sig=JZ6tR1UgVbat2uFZhsjD32Ld7DJAtER4g6i7VfR5yXQ%3D)
.png?sv=2022-11-02&spr=https&st=2025-07-17T14%3A40%3A34Z&se=2025-07-17T15%3A01%3A34Z&sr=c&sp=r&sig=JZ6tR1UgVbat2uFZhsjD32Ld7DJAtER4g6i7VfR5yXQ%3D)
If you are struggling to find the correct location, we recommend using the filter function. See example below.
Click the Types down arrow to the right of the Location Search bar
.png?sv=2022-11-02&spr=https&st=2025-07-17T14%3A40%3A34Z&se=2025-07-17T15%3A01%3A34Z&sr=c&sp=r&sig=JZ6tR1UgVbat2uFZhsjD32Ld7DJAtER4g6i7VfR5yXQ%3D)
.png?sv=2022-11-02&spr=https&st=2025-07-17T14%3A40%3A34Z&se=2025-07-17T15%3A01%3A34Z&sr=c&sp=r&sig=JZ6tR1UgVbat2uFZhsjD32Ld7DJAtER4g6i7VfR5yXQ%3D)
Select Location Type from the options
.png?sv=2022-11-02&spr=https&st=2025-07-17T14%3A40%3A34Z&se=2025-07-17T15%3A01%3A34Z&sr=c&sp=r&sig=JZ6tR1UgVbat2uFZhsjD32Ld7DJAtER4g6i7VfR5yXQ%3D)
Once you select the Location Type the list will automatically filter the list
Select the Location Name from the filtered list.
If your organization is looking to update the information on the Appointment Notification auto fax please submit a Change Order Request Form.
Managing Fax Templates
User Profile
Once logged in click the top right where your username is displayed. Select User Profile from the options.
.png?sv=2022-11-02&spr=https&st=2025-07-17T14%3A40%3A34Z&se=2025-07-17T15%3A01%3A34Z&sr=c&sp=r&sig=JZ6tR1UgVbat2uFZhsjD32Ld7DJAtER4g6i7VfR5yXQ%3D)
From your User Profile page, click to the left eRequest user settings, this will take you to the user settings section..png?sv=2022-11-02&spr=https&st=2025-07-17T14%3A40%3A34Z&se=2025-07-17T15%3A01%3A34Z&sr=c&sp=r&sig=JZ6tR1UgVbat2uFZhsjD32Ld7DJAtER4g6i7VfR5yXQ%3D)
Then click the Manage templates
.png?sv=2022-11-02&spr=https&st=2025-07-17T14%3A40%3A34Z&se=2025-07-17T15%3A01%3A34Z&sr=c&sp=r&sig=JZ6tR1UgVbat2uFZhsjD32Ld7DJAtER4g6i7VfR5yXQ%3D)
Uploading a Template
In the Manage Templates, there will be a box where you can drag and drop your word document template or click Browse files which will open the file dialogue box where you can select the document to upload. Note: Fax templates must be word file format (i.e. docx)
.png?sv=2022-11-02&spr=https&st=2025-07-17T14%3A40%3A34Z&se=2025-07-17T15%3A01%3A34Z&sr=c&sp=r&sig=JZ6tR1UgVbat2uFZhsjD32Ld7DJAtER4g6i7VfR5yXQ%3D)
Once the template has been uploaded the user can click edit to view the template and make any adjustments. When uploading a template it is recommended that users Name the template with an appropriate name that easily describes the purpose and use case for this template. The file name will automatically display what the original file name was, users can edit the name in edit mode on the Left side of the edit template screen where the mandatory field called Name, then click Update Template to save any changes.
.png?sv=2022-11-02&spr=https&st=2025-07-17T14%3A40%3A34Z&se=2025-07-17T15%3A01%3A34Z&sr=c&sp=r&sig=JZ6tR1UgVbat2uFZhsjD32Ld7DJAtER4g6i7VfR5yXQ%3D)
Download, Edit or Delete Templates
In the manage templates all existing templates that have been added to the users profile will appear with three actions:
Download - users can download any template and save on their computer if needed for sharing or editing
Edit - opens the template in edit mode and allow the user to make any changes
Delete - if the template is no longer required it is recommended to delete it
.png?sv=2022-11-02&spr=https&st=2025-07-17T14%3A40%3A34Z&se=2025-07-17T15%3A01%3A34Z&sr=c&sp=r&sig=JZ6tR1UgVbat2uFZhsjD32Ld7DJAtER4g6i7VfR5yXQ%3D)
Auto-Fill Keys (pre-populating fields)
Within the Edit Template on the left side of the screen there is a section called auto-fill keys. These keys when added into the template will automatically pull the corresponding information into your template. The user can highlight the item they want from the list and paste into the template where they want the information to display.
Please be advised this feature will need to be fully tested in your Test environment prior to use in production.
All screen capture were taken from Test environments.
Fax Information Checklist
Reasons for issues are typically a device issue (out of paper/ink, turned off, older machine) or connectivity issues (no fax tone, call dropping, line answered/interrupted by human, busy, etc.)
If errors are consistent with a specific line, it may be an isolated issue with the device itself or a connectivity quality issue.
Have you confirmed with the office/organization that the fax number is correct?
If yes, have you confirmed if there is a 1 before the fax line?
Have you confirmed with the office/organization that the fax machine has the capability to send and receive faxes. (Inbound and Outbound) Does the machine have the settings enabled for 1800 numbers?
Have you confirmed with the office/organization that the fax is working?
Is it connected to the internet? Are there potential internet issues preventing the fax transmission from sending across?
Is it connected to the telephone line (hardwired)? Are multiple devices or systems connected to the same line? Does the line use a surge protector or switching device that could be causing interference with the connection transmission?
Have you verified the fax line is working? (this can be done by calling the number). Do you hear an instant, loud and clear fax tone?
If the line is not instant, than settings on the receiving machine may need to be updated. These setting updates are unique to the devices.
Are you able to send directly from your machine to their machine? This may assist in ruling out issues related to an isolated machine.
Are you able to resend the fax? This is sometimes best after waiting a few minutes to rule out busy fax tones.
Advise the office/organization to restart their device.
If the outcome of the above troubleshooting determines that the issue is isolated to one device/office/organization, please review our Fax Troubleshooting documentation on our Support Portal.
If the outcome does not appear to be isolated, please provide the following information:
Receiving number
Sending number
Date and time of occurrence (three examples within 24 hours is preferred)
Troubleshooting results
Fax Troubleshooting
Here is some troubleshooting information that would be helpful to the clinic that is having difficulty with faxes.
Partial or Failed fax transmissions may be caused by a variety of factors.
Most fax transmission issues are caused by connectivity issues. Commonly, poor quality connections will prevent the fax machine from working properly, if at all. Fax machines require a connection that is free from static and line noise to connect. The fax line should not have any abnormal sounds, including static, background noise, or a weak dial tone.
To help reduce fax transmission errors moving forward, here are a few suggestions to help with troubleshooting both your phone line and your fax equipment:
Phone line:
Contact your phone company’s support team and explain that you are experiencing a high failure rate with your fax machine and frequent disconnects while attempting to transmit faxes. Phone line support may assist in performing diagnostic tests or may dispatch a technician to physically inspect the lines near your building, or in the building itself.
Fax equipment:
If your phone company's technician is unable to resolve the connection issues, the main cause of error may be the fax equipment itself. It is recommended to contact the equipment manufacturer or supplier support line and explain the increase in fax errors as well as the troubleshooting steps your team has already attempted. The manufacturer or supplier support team may have several suggestions for your specific equipment, such as changing settings on the machines/equipment, restarting the equipment, etc.
We appreciate you looking into and addressing the concerns with your fax connection and services. Resolving fax transmission issues will help to ensure that we receive your faxed referrals moving forward, and that no patient referral is impacted
